OCICLI コマンドとjq コマンドのメモ
目次
コンパートメントID取得
.name == の条件は必要に応じて変更。
$ oci iam compartment list | jq -r '.data | map(select(.name=="poul"))[].id '
コンピュートの表示名、ocid取得
$ oci compute instance list --compartment-id=$comp_id | jq -r '.data[] | {name:."display-name",id:."id"}'
{
  "name": "db01",
  "id": "ocid1.instance.oc1.ap-tokyo-1.xxx"
}

$ oci compute instance list --compartment-id=$comp_id | jq -r '.data | map(select(."display-name"=="db01"))[] | .id'
ocid1.instance.oc1.ap-tokyo-1.xxx
コンピュート起動
$ oci compute instance action --instance-id=$inst_id --action start
コンピュート停止
$ oci compute instance action --instance-id=$inst_id --action stop
OCICLI on docker container
目次
- 目次
- やること
- Oracle Linux のイメージをpull
- コンテナ起動
- Python3導入
- OCICLI インストール
- OCIコマンドの確認
- OCIコマンドの設定
- 公開鍵の確認
- ユーザーにAPIキーの設定
- 動作確認
- dockerイメージのコミット
- 参考
やること
OCICLI をDocker container上にインストールしたいと思います。
Oracle Linux のイメージをpull
$ docker pull oraclelinux:7-slim
7-slim: Pulling from library/oraclelinux
89ad662320ef: Pull complete
Digest: sha256:68d5af67eaa92bb7346d6a7626761fc30a6d0934abbb32ac2af71d5d74b3023b
Status: Downloaded newer image for oraclelinux:7-slim
docker.io/library/oraclelinux:7-slim

$ docker image list
REPOSITORY               TAG       IMAGE ID       CREATED       SIZE
docker/getting-started   latest    adfdb308d623   4 days ago    27.4MB
oraclelinux              7-slim    1aadc5c6dfe3   4 weeks ago   162MB
コンテナ起動
$ docker run -it oraclelinux:7-slim
bash-4.2#
Python3導入
bash-4.2# yum install python3
OCICLI インストール
bash-4.2# bash -c "$(curl -L https://raw.githubusercontent.com/oracle/oci-cli/master/scripts/install/install.sh)"

  % Total    % Received % Xferd  Average Speed   Time    Time     Time  Current
                                 Dload  Upload   Total   Spent    Left  Speed
100 16641  100 16641    0     0  73865      0 --:--:-- --:--:-- --:--:-- 73960

    ******************************************************************************
    You have started the OCI CLI Installer in interactive mode. If you do not wish
    to run this in interactive mode, please include the --accept-all-defaults option.
    If you have the script locally and would like to know more about
    input options for this script, then you can run:
    ./install.sh -h
    If you would like to know more about input options for this script, refer to:
    https://github.com/oracle/oci-cli/blob/master/scripts/install/README.rst
    ******************************************************************************
Downloading Oracle Cloud Infrastructure CLI install script from https://raw.githubusercontent.com/oracle/oci-cli/v3.2.1/scripts/install/install.py to /tmp/oci_cli_install_tmp_Q888.
######################################################################## 100.0%
Running install script.
python3 /tmp/oci_cli_install_tmp_Q888
-- Verifying Python version.
-- Python version 3.6.8 okay.

===> In what directory would you like to place the install? (leave blank to use '/root/lib/oracle-cli'):
-- Creating directory '/root/lib/oracle-cli'.
-- We will install at '/root/lib/oracle-cli'.

===> In what directory would you like to place the 'oci' executable? (leave blank to use '/root/bin'):
-- Creating directory '/root/bin'.
-- The executable will be in '/root/bin'.

===> In what directory would you like to place the OCI scripts? (leave blank to use '/root/bin/oci-cli-scripts'):
-- Creating directory '/root/bin/oci-cli-scripts'.
-- The scripts will be in '/root/bin/oci-cli-scripts'.

===> Currently supported optional packages are: ['db (will install cx_Oracle)']
What optional CLI packages would you like to be installed (comma separated names; press enter if you don't need any optional packages)?:
-- The optional packages installed will be ''.
-- Trying to use python3 venv.
-- Executing: ['/usr/bin/python3', '-m', 'venv', '/root/lib/oracle-cli']
-- Executing: ['/root/lib/oracle-cli/bin/pip', 'install', '--upgrade', 'pip']
Collecting pip
  Downloading https://files.pythonhosted.org/packages/a4/6d/6463d49a933f547439d6b5b98b46af8742cc03ae83543e4d7688c2420f8b/pip-21.3.1-py3-none-any.whl (1.7MB)
    100% |████████████████████████████████| 1.7MB 1.1MB/s
Installing collected packages: pip
  Found existing installation: pip 9.0.3
    Uninstalling pip-9.0.3:
      Successfully uninstalled pip-9.0.3
Successfully installed pip-21.3.1
You are using pip version 21.3.1, however version 22.0.3 is available.
You should consider upgrading via the 'pip install --upgrade pip' command.
-- Executing: ['/root/lib/oracle-cli/bin/pip', 'install', '--cache-dir', '/tmp/tmpgc3ok70p', 'wheel', '--upgrade']
Collecting wheel
  Downloading wheel-0.37.1-py2.py3-none-any.whl (35 kB)
Installing collected packages: wheel
Successfully installed wheel-0.37.1
-- Executing: ['/root/lib/oracle-cli/bin/pip', 'install', '--cache-dir', '/tmp/tmpgc3ok70p', 'oci_cli', '--upgrade']
Collecting oci_cli
  Downloading oci_cli-3.5.0-py3-none-any.whl (24.3 MB)
     |████████████████████████████████| 24.3 MB 12.4 MB/s
Collecting cryptography<=3.4.7,>=3.2.1
  Downloading cryptography-3.4.7-cp36-abi3-manylinux2014_aarch64.whl (3.1 MB)
     |████████████████████████████████| 3.1 MB 12.1 MB/s
Collecting python-dateutil<3.0.0,>=2.5.3
  Downloading python_dateutil-2.8.2-py2.py3-none-any.whl (247 kB)
     |████████████████████████████████| 247 kB 9.6 MB/s
Collecting click==7.1.2
  Downloading click-7.1.2-py2.py3-none-any.whl (82 kB)
     |████████████████████████████████| 82 kB 3.4 MB/s
Collecting pyOpenSSL==19.1.0
  Downloading pyOpenSSL-19.1.0-py2.py3-none-any.whl (53 kB)
     |████████████████████████████████| 53 kB 5.4 MB/s
Collecting pytz>=2016.10
  Downloading pytz-2021.3-py2.py3-none-any.whl (503 kB)
     |████████████████████████████████| 503 kB 11.3 MB/s
Collecting jmespath==0.10.0
  Downloading jmespath-0.10.0-py2.py3-none-any.whl (24 kB)
Collecting oci==2.56.0
  Downloading oci-2.56.0-py2.py3-none-any.whl (12.5 MB)
     |████████████████████████████████| 12.5 MB 10.6 MB/s
Collecting arrow>=1.0.0
  Downloading arrow-1.2.2-py3-none-any.whl (64 kB)
     |████████████████████████████████| 64 kB 6.0 MB/s
Collecting terminaltables==3.1.0
  Downloading terminaltables-3.1.0.tar.gz (12 kB)
  Preparing metadata (setup.py) ... done
Collecting certifi
  Downloading certifi-2021.10.8-py2.py3-none-any.whl (149 kB)
     |████████████████████████████████| 149 kB 11.2 MB/s
Collecting six>=1.15.0
  Downloading six-1.16.0-py2.py3-none-any.whl (11 kB)
Collecting PyYAML<6,>=5.4
  Downloading PyYAML-5.4.1-cp36-cp36m-manylinux2014_aarch64.whl (726 kB)
     |████████████████████████████████| 726 kB 11.2 MB/s
Collecting circuitbreaker<2.0.0,>=1.3.1
  Downloading circuitbreaker-1.3.2.tar.gz (7.9 kB)
  Preparing metadata (setup.py) ... done
Collecting typing-extensions
  Downloading typing_extensions-4.1.1-py3-none-any.whl (26 kB)
Collecting cffi>=1.12
  Downloading cffi-1.15.0-cp36-cp36m-manylinux_2_17_aarch64.manylinux2014_aarch64.whl (433 kB)
     |████████████████████████████████| 433 kB 12.3 MB/s
Collecting pycparser
  Downloading pycparser-2.21-py2.py3-none-any.whl (118 kB)
     |████████████████████████████████| 118 kB 12.8 MB/s
Building wheels for collected packages: terminaltables, circuitbreaker
  Building wheel for terminaltables (setup.py) ... done
  Created wheel for terminaltables: filename=terminaltables-3.1.0-py3-none-any.whl size=15355 sha256=05e9fb3f5a78ad9460b858974cb1968899d812cde2d8e443003fe1b8d540423c
  Stored in directory: /tmp/tmpgc3ok70p/wheels/86/1b/58/c23af2fe683acd8edc15d5a1268f0242be1ff2cf827fe34737
  Building wheel for circuitbreaker (setup.py) ... done
  Created wheel for circuitbreaker: filename=circuitbreaker-1.3.2-py3-none-any.whl size=6017 sha256=2059f5037fbaa29a7df94a3090622cf78e599b8e2f721098af74247526499b87
  Stored in directory: /tmp/tmpgc3ok70p/wheels/2b/54/c2/70629ee4335118768dceec192e138df3636ecf02973fa2c1f0
Successfully built terminaltables circuitbreaker
Installing collected packages: pycparser, cffi, six, cryptography, typing-extensions, pytz, python-dateutil, pyOpenSSL, circuitbreaker, certifi, terminaltables, PyYAML, oci, jmespath, click, arrow, oci-cli
Successfully installed PyYAML-5.4.1 arrow-1.2.2 certifi-2021.10.8 cffi-1.15.0 circuitbreaker-1.3.2 click-7.1.2 cryptography-3.4.7 jmespath-0.10.0 oci-2.56.0 oci-cli-3.5.0 pyOpenSSL-19.1.0 pycparser-2.21 python-dateutil-2.8.2 pytz-2021.3 six-1.16.0 terminaltables-3.1.0 typing-extensions-4.1.1

===> Modify profile to update your $PATH and enable shell/tab completion now? (Y/n): Y

===> Could not automatically find a suitable file to use. Create /root/.bashrc now? (Y/n): Y
-- Backed up '/root/.bashrc' to '/root/.bashrc.backup'
-- Tab completion set up complete.
-- If tab completion is not activated, verify that '/root/.bashrc' is sourced by your shell.
--
-- ** Run `exec -l $SHELL` to restart your shell. **
--
-- Installation successful.
-- Run the CLI with /root/bin/oci --help
OCIコマンドの確認
bash-4.2# bash
bash-4.2# oci -v
3.5.0
OCIコマンドの設定
★の箇所で値を入力します。
bash-4.2# oci setup config
    This command provides a walkthrough of creating a valid CLI config file.

    The following links explain where to find the information required by this
    script:

    User API Signing Key, OCID and Tenancy OCID:

        https://docs.cloud.oracle.com/Content/API/Concepts/apisigningkey.htm#Other

    Region:

        https://docs.cloud.oracle.com/Content/General/Concepts/regions.htm

    General config documentation:

        https://docs.cloud.oracle.com/Content/API/Concepts/sdkconfig.htm


Enter a location for your config [/root/.oci/config]:
Enter a user OCID: ocid1.user.oc1..****  ---- ★
Enter a tenancy OCID: ocid1.tenancy.oc1..****  ---- ★
Enter a region by index or name(e.g.
1: af-johannesburg-1, 2: ap-chiyoda-1, 3: ap-chuncheon-1, 4: ap-dcc-canberra-1, 5: ap-hyderabad-1,
6: ap-ibaraki-1, 7: ap-melbourne-1, 8: ap-mumbai-1, 9: ap-osaka-1, 10: ap-seoul-1,
11: ap-singapore-1, 12: ap-sydney-1, 13: ap-tokyo-1, 14: ca-montreal-1, 15: ca-toronto-1,
16: eu-amsterdam-1, 17: eu-frankfurt-1, 18: eu-marseille-1, 19: eu-milan-1, 20: eu-stockholm-1,
21: eu-zurich-1, 22: il-jerusalem-1, 23: me-abudhabi-1, 24: me-dcc-muscat-1, 25: me-dubai-1,
26: me-jeddah-1, 27: sa-santiago-1, 28: sa-saopaulo-1, 29: sa-vinhedo-1, 30: uk-cardiff-1,
31: uk-gov-cardiff-1, 32: uk-gov-london-1, 33: uk-london-1, 34: us-ashburn-1, 35: us-gov-ashburn-1,
36: us-gov-chicago-1, 37: us-gov-phoenix-1, 38: us-langley-1, 39: us-luke-1, 40: us-phoenix-1,
41: us-sanjose-1): 13  ---- ★
Do you want to generate a new API Signing RSA key pair? (If you decline you will be asked to supply the path to an existing key.) [Y/n]: Y
Enter a directory for your keys to be created [/root/.oci]:
Enter a name for your key [oci_api_key]:
Public key written to: /root/.oci/oci_api_key_public.pem
Enter a passphrase for your private key (empty for no passphrase):
Private key written to: /root/.oci/oci_api_key.pem
Fingerprint: 8d:e6:7e:cf:15:ec:b4:9a:5d:c8:d9:b9:5b:dc:03:53
Config written to /root/.oci/config


    If you haven't already uploaded your API Signing public key through the
    console, follow the instructions on the page linked below in the section
    'How to upload the public key':

        https://docs.cloud.oracle.com/Content/API/Concepts/apisigningkey.htm#How2
user/tenancy OCIDの確認
遷移

user OCIDコピー

tenancy OCIDコピー

公開鍵の確認
bash-4.2# cat /root/.oci/oci_api_key_public.pem
-----BEGIN PUBLIC KEY-----
****************************
****************************
****************************
-----END PUBLIC KEY-----
ユーザーにAPIキーの設定
「プロファイル」-「ユーザー設定」から左タブの「APIキー」を選択


Paste pub key を選択し、確認した公開鍵を貼り付ける。Add -> Close。

鍵が追加されフィンガープリントが表示されていることを確認

動作確認
bash-4.2# oci iam region list
{
  "data": [
    {
      "key": "AMS",
      "name": "eu-amsterdam-1"
    },
    {
      "key": "ARN",
      "name": "eu-stockholm-1"
・・・
dockerイメージのコミット
$ docker ps
CONTAINER ID   IMAGE                COMMAND       CREATED          STATUS          PORTS     NAMES
cea66ba5dfba   oraclelinux:7-slim   "/bin/bash"   29 minutes ago   Up 29 minutes             bold_fermi

$ docker commit cea66ba5dfba ocicli

$ docker images
REPOSITORY               TAG       IMAGE ID       CREATED          SIZE
ocicli                   latest    8ff29331de26   16 seconds ago   1.09GB
docker/getting-started   latest    adfdb308d623   4 days ago       27.4MB
oraclelinux              7-slim    1aadc5c6dfe3   4 weeks ago      162MB
参考
OCI コンソールの接続元IPアドレスの制限とCLIからの解除
目次
やること
- OCIコンソールにログインを許可する接続元のIPアドレスを制限
- 接続元IP制限で誤ってコンソールログインできなくなってしまった場合の制限解除
接続元の制限
ネットワーク・ソースの作成
ネットワーク・ソースに遷移

ネットワーク・ソースの作成

項目を入力して作成を押下します。
- OCI以外からのアクセスを許可する場合は、接続元のCIDRブロックを指定します。(パブリックIP)

認証設定
- 「認証設定」に遷移します。

- 認証設定の編集

- 作成したネットワーク・ソースを選択し保存します。

接続確認
一度ログアウトし、ネットワークを切り替えてログインを試みます。
- 認証設定の管理 ネットワーク・ソース制限に対する変更が有効になるタイミング
ネットワーク・ソース制限が定義されると、コンソールにサインインしているユーザーは現在のセッションを続行できますが、サインアウト後、次回サインインしようとしたときにネットワーク制限が適用されます。

制限解除
- 「事前設定」、「事前確認」については「接続元の制限」を行う前にやっておきましょう。
※環境変数$tenant_idも事前に設定しています。
事前設定
- APIキーの設定が行われていることを確認します。
OCICLIの初期設定時に設定されているはずです。
「プロファイル」メニュー から「ユーザー設定」→「APIキー」タブを選択し、
OCICLIの初期設定で設定したキーが表示されていれば問題ありません。

事前確認
- ネットワーク・リソースを設定する前の設定を確認しておきます。
$ oci iam authentication-policy get --compartment-id $tenant_id
{
  "data": {
    "compartment-id": "ocid1.tenancy.oc1.****",
    "network-policy": {
      "network-source-ids": []
    },
    "password-policy": {
      "is-lowercase-characters-required": true,
      "is-numeric-characters-required": true,
      "is-special-characters-required": true,
      "is-uppercase-characters-required": true,
      "is-username-containment-allowed": false,
      "minimum-password-length": 8
    }
  },
  "etag": "bea7c39e38d4ee6176c31bcbdae9b955e97fdc68"
}
OCICLIから制限解除
- では実際に解除します。
input.json で使用するフォーマットを確認します。
$ oci iam authentication-policy update --compartment-id $tenant_id --generate-full-command-json-input
{
  "compartmentId": "string",
  "force": true,
  "ifMatch": "string",
  "networkPolicy": {
    "networkSourceIds": [
      "string",
      "string"
    ]
  },
  "passwordPolicy": {
    "isLowercaseCharactersRequired": true,
    "isNumericCharactersRequired": true,
    "isSpecialCharactersRequired": true,
    "isUppercaseCharactersRequired": true,
    "isUsernameContainmentAllowed": true,
    "minimumPasswordLength": 0
  }
}
- 上記をもとにinput.jsonを作成します。今回は以下の様にします。
$ cat input.json
{
  "compartmentId": "ocid1.tenancy.oc1..****",
  "force": true,
  "networkPolicy": {
    "networkSourceIds": []
  },
  "passwordPolicy": {
    "isLowercaseCharactersRequired": true,
    "isNumericCharactersRequired": true,
    "isSpecialCharactersRequired": true,
    "isUppercaseCharactersRequired": true,
    "isUsernameContainmentAllowed": false,
    "minimumPasswordLength": 8
  }
}
- 以下を実行し、ネットワーク・ソースの設定を解除します
$ oci iam authentication-policy update --compartment-id $tenant_id --from-json file://input.json


$ oci iam authentication-policy get --compartment-id $tenant_id
参考
Oracle Database 実行計画を実行統計付きで取得
目次
取得方法
alter session set statistics_level = ALL;

-- 実行計画確認対象のSQL
select * from t1 where c1 = 1;

set line 200 pages 1000 tab off
select * from table(DBMS_XPLAN.DISPLAY_CURSOR(format=>'ALL ALLSTATS LAST'));
取得結果
PLAN_TABLE_OUTPUT
--------------------------------------------------------------------------------------------------------------------------------------------------------------------------------------------------------
SQL_ID  3c3yp27cag5mv, child number 0
-------------------------------------
select * from t1 where c1 = 1

Plan hash value: 1141790563

-------------------------------------------------------------------------------------------------------------------------------
| Id  | Operation                   | Name  | Starts | E-Rows |E-Bytes| Cost (%CPU)| E-Time   | A-Rows |   A-Time   | Buffers |
-------------------------------------------------------------------------------------------------------------------------------
|   0 | SELECT STATEMENT            |       |      1 |        |       |     1 (100)|          |      1 |00:00:00.01 |       3 |
|   1 |  TABLE ACCESS BY INDEX ROWID| T1    |      1 |      1 |    26 |     1   (0)| 00:00:01 |      1 |00:00:00.01 |       3 |
|*  2 |   INDEX UNIQUE SCAN         | PK_T1 |      1 |      1 |       |     1   (0)| 00:00:01 |      1 |00:00:00.01 |       2 |
-------------------------------------------------------------------------------------------------------------------------------

Query Block Name / Object Alias (identified by operation id):
-------------------------------------------------------------

   1 - SEL$1 / T1@SEL$1
   2 - SEL$1 / T1@SEL$1

Predicate Information (identified by operation id):
---------------------------------------------------

   2 - access("C1"=1)

Column Projection Information (identified by operation id):
-----------------------------------------------------------

   1 - "C1"[NUMBER,22], "T1"."C2"[NUMBER,22]
   2 - "T1".ROWID[ROWID,10], "C1"[NUMBER,22]


31 rows selected.

SQL>
Mac Book Air の設定メモ
今後の買換えた時などのためにメモしておきたい。
目次
隠しファイルの表示
$ defaults write com.apple.finder AppleShowAllFiles TRUE
## 確認
$ defaults read com.apple.finder AppleShowAllFiles
TRUE
terminal 環境変数ファイル
~ % ls -lda .z*
-rw-r--r--   1 hiroshi  staff    45  1 20 23:16 .zprofile
-rw-------   1 hiroshi  staff  2433  1 22 01:20 .zsh_history
drwx------  28 hiroshi  staff   896  1 22 01:24 .zsh_sessions
-rw-r--r--   1 hiroshi  staff    36  1 20 22:27 .zshrc
- .zprofile
if [ -f ~/.zshrc ]; then
    . ~/.zshrc
fi
- .zshrc
alias ll="ls -l"
alias rm="rm -i"
MacOS Catalinaはデフォルトのログインシェルがbashではないらしい。
hosts の設定
Linuxでいうところの/etc/hosts の編集に相当することは以下で実施できる様です。
sudo vi /private/etc/hosts
terminalのログ取得設定
script ~/99_terminallog/terminal_`openssl rand -hex 2`_`date +%Y_%m_%d_%H%M%S`.log

Homebrew
macOS(またはLinux)用パッケージマネージャー — Homebrew
$ /bin/bash -c "$(curl -fsSL https://raw.githubusercontent.com/Homebrew/install/HEAD/install.sh)"
...
...
...
==> Next steps:
- Run these two commands in your terminal to add Homebrew to your PATH:
    echo 'eval "$(/opt/homebrew/bin/brew shellenv)"' >> /Users/hiroshi/.zprofile
    eval "$(/opt/homebrew/bin/brew shellenv)"
- Run brew help to get started
- Further documentation:
    https://docs.brew.sh
hiroshi@hiroshinoMacBook-Air ~ %  echo 'eval "$(/opt/homebrew/bin/brew shellenv)"' >> /Users/hiroshi/.zprofile
hiroshi@hiroshinoMacBook-Air ~ % cat ~/.zprofile

if [ -f ~/.zshrc ]; then
    . ~/.zshrc
fi

eval "$(/opt/homebrew/bin/brew shellenv)"
hiroshi@hiroshinoMacBook-Air ~ % eval "$(/opt/homebrew/bin/brew shellenv)"
hiroshi@hiroshinoMacBook-Air ~ %
hiroshi@hiroshinoMacBook-Air ~ % which brew
/opt/homebrew/bin/brew
visual-studio-code
hiroshi@hiroshinoMacBook-Air ~ % brew search visual-studio-code
==> Casks
homebrew/cask-versions/visual-studio-code-insiders
hiroshi@hiroshinoMacBook-Air ~ % brew install visual-studio-code --cask
==> Tapping homebrew/cask
Cloning into '/opt/homebrew/Library/Taps/homebrew/homebrew-cask'...
remote: Enumerating objects: 618333, done.
remote: Counting objects: 100% (16/16), done.
remote: Compressing objects: 100% (14/14), done.
remote: Total 618333 (delta 6), reused 11 (delta 2), pack-reused 618317
Receiving objects: 100% (618333/618333), 282.63 MiB | 10.49 MiB/s, done.
Resolving deltas: 100% (437277/437277), done.
Tapped 3957 casks (4,028 files, 302.4MB).
==> Downloading https://update.code.visualstudio.com/1.63.2/darwin-arm64/stable
==> Downloading from https://az764295.vo.msecnd.net/stable/899d46d82c4c95423fb7e10e68eba52050e30ba3/VSCode-darwin-arm64.
######################################################################## 100.0%
==> Installing Cask visual-studio-code
==> Moving App 'Visual Studio Code.app' to '/Applications/Visual Studio Code.app'
==> Linking Binary 'code' to '/opt/homebrew/bin/code'
🍺  visual-studio-code was successfully installed!
vimのエミュレーター
VSCode Neovim - Visual Studio Marketplace
brew install neovim
vimのキー移動で長押しの有効化
defaults write com.microsoft.VSCode ApplePressAndHoldEnabled -bool false

VSCodeでキーボードの長押しができなくなったときの対処方法 | book-reviews.blog
Docker上の開発環境
これをやりたい。
M1 Mac で Python環境 (Docker + VSCode編)
DockerをHomebrewでMac OSに導入する方法 - Qiita
brew install --cask docker
OCI上に検証用のOracle Databaseを立てる
目次
- 目次
- はじめに
- VMの作成
- 接続元IPアドレスの制限
- OS設定
- 環境変数ファイルの作成
- インストール
- リスナー起動
- DB作成
- 接続確認
- tnsnames.oraの設定
- 自動起動設定
- PDB自動起動設定
はじめに
Oracle Database の検証用として次のコンセプトでDBを作成したいと思います。
- 気軽に触れる
- 維持が面倒でない(PCの容量を取らない)
- お金をかけたくない
- OSも触れる
小さめのVMを作成して、その上にサイレント・インストールで Single DBを立てます。
DB作成の手順はこちらを参考にします。
ORACLE-BASE - Oracle Database 19c Installation On Oracle Linux 7 (OL7)
VMの作成
VMのImage、シェイプは以下の様にしました。
- Image : Oracle-Linux-7.9-2021.12.08-0
- Shape : VM.Standard.E4.Flex
- OCPU: 2
- Memory: 4GB
- ブートボリューム: デフォルトサイズ(46.xGB)
dfはこんな感じです。
[root@db01 ~]# df -h
Filesystem      Size  Used Avail Use% Mounted on
devtmpfs        1.8G     0  1.8G   0% /dev
tmpfs           1.8G     0  1.8G   0% /dev/shm
tmpfs           1.8G  8.8M  1.8G   1% /run
tmpfs           1.8G     0  1.8G   0% /sys/fs/cgroup
/dev/sda3        39G   14G   25G  35% /
/dev/sda1       200M  7.5M  193M   4% /boot/efi
tmpfs           364M     0  364M   0% /run/user/0
tmpfs           364M     0  364M   0% /run/user/1000
tmpfs           364M     0  364M   0% /run/user/994
不正な接続は気になりますが、接続を楽にしたいのでVMはパブリック・セグメントに作成し、踏み台(Bastion)は作りません。
一応、接続元のIP アドレスは制限します。
接続元IPアドレスの制限
VMに接続したら /var/log/secureを参照し、自身の接続元のIPアドレスを確認します。
その、IPアドレスをセキュリティ・リストのイングレス・ルールの22番ポートへの接続元IPに設定します。
OS設定
必要なパッケージを入れます。
[root@db01 ~]# yum install -y oracle-database-preinstall-19c
[root@db01 ~]# yum update -y
oracle ユーザーも作成されます
[root@db01 ~]# id oracle
uid=54321(oracle) gid=54321(oinstall) groups=54321(oinstall),54322(dba),54323(oper),54324(backupdba),54325(dgdba),54326(kmdba),54330(racdba)
SELinux無効化
[root@db01 ~]# vi /etc/selinux/config
[root@db01 ~]#
[root@db01 ~]# cat /etc/selinux/config

# This file controls the state of SELinux on the system.
# SELINUX= can take one of these three values:
#     enforcing - SELinux security policy is enforced.
#     permissive - SELinux prints warnings instead of enforcing.
#     disabled - No SELinux policy is loaded.
SELINUX=permissive
# SELINUXTYPE= can take one of three values:
#     targeted - Targeted processes are protected,
#     minimum - Modification of targeted policy. Only selected processes are protected.
#     mls - Multi Level Security protection.
SELINUXTYPE=targeted

[root@db01 ~]# getenforce
Enforcing
[root@db01 ~]# setenforce Permissive
[root@db01 ~]# getenforce
Permissive
[root@db01 ~]#
Firewalld停止
● firewalld.service - firewalld - dynamic firewall daemon
   Loaded: loaded (/usr/lib/systemd/system/firewalld.service; enabled; vendor preset: enabled)
   Active: active (running) since Fri 2022-01-14 13:55:53 GMT; 53min ago
     Docs: man:firewalld(1)
 Main PID: 1336 (firewalld)
   Memory: 0B
   CGroup: /system.slice/firewalld.service
           mq1336 /usr/bin/python2 -Es /usr/sbin/firewalld --nofork --nopid

Jan 14 13:55:53 localhost.localdomain systemd[1]: Starting firewalld - dynamic firewall daemon...
Jan 14 13:55:53 localhost.localdomain systemd[1]: Started firewalld - dynamic firewall daemon.
Jan 14 13:55:54 localhost.localdomain firewalld[1336]: WARNING: AllowZoneDrifting is enabled. This is considered an insecure configuration option. It will be removed in a future release. Please consider disabling it now.
[root@db01 ~]# systemctl stop firewalld
[root@db01 ~]# systemctl disable firewalld
Removed symlink /etc/systemd/system/multi-user.target.wants/firewalld.service.
Removed symlink /etc/systemd/system/dbus-org.fedoraproject.FirewallD1.service.
ディレクトリ作成。
[root@db01 ~]# mkdir -p /u01/app/oracle/product/19.0.0/dbhome_1
[root@db01 ~]# mkdir -p /u02/oradata
[root@db01 ~]# chown -R oracle:oinstall /u01 /u02
[root@db01 ~]# chmod -R 775 /u01 /u02
環境変数ファイルの作成
[oracle@db01 ~]$ vi .bash_profile
[oracle@db01 ~]$
[oracle@db01 ~]$ cat .bash_profile
# .bash_profile

# Get the aliases and functions
if [ -f ~/.bashrc ]; then
        . ~/.bashrc
fi

# User specific environment and startup programs

PATH=$PATH:$HOME/.local/bin:$HOME/bin

export PATH

export ORACLE_UNQNAME=cdb1
export ORACLE_BASE=/u01/app/oracle
export ORACLE_HOME=$ORACLE_BASE/product/19.0.0/dbhome_1
export ORA_INVENTORY=/u01/app/oraInventory
export ORACLE_SID=cdb1
export PDB_NAME=pdb1
export DATA_DIR=/u02/oradata
export PATH=$ORACLE_HOME/bin:$PATH
export LD_LIBRARY_PATH=$ORACLE_HOME/lib:/lib:/usr/lib

[oracle@db01 ~]$ . .bash_profile
インストール
バイナリは先にサーバに送り込んでおきます。解凍。
[oracle@db01 ~]$ cd $ORACLE_HOME
[oracle@db01 dbhome_1]$ unzip -oq /tmp/LINUX.X64_193000_db_home.zip
インストーラー実行
[oracle@db01 dbhome_1]$ ./runInstaller -ignorePrereq -waitforcompletion -silent                        \
>     -responseFile ${ORACLE_HOME}/install/response/db_install.rsp               \
>     oracle.install.option=INSTALL_DB_SWONLY                                    \
>     ORACLE_HOSTNAME=${ORACLE_HOSTNAME}                                         \
>     UNIX_GROUP_NAME=oinstall                                                   \
>     INVENTORY_LOCATION=${ORA_INVENTORY}                                        \
>     SELECTED_LANGUAGES=en,en_GB                                                \
>     ORACLE_HOME=${ORACLE_HOME}                                                 \
>     ORACLE_BASE=${ORACLE_BASE}                                                 \
>     oracle.install.db.InstallEdition=EE                                        \
>     oracle.install.db.OSDBA_GROUP=dba                                          \
>     oracle.install.db.OSBACKUPDBA_GROUP=dba                                    \
>     oracle.install.db.OSDGDBA_GROUP=dba                                        \
>     oracle.install.db.OSKMDBA_GROUP=dba                                        \
>     oracle.install.db.OSRACDBA_GROUP=dba                                       \
>     SECURITY_UPDATES_VIA_MYORACLESUPPORT=false                                 \
>     DECLINE_SECURITY_UPDATES=true
Launching Oracle Database Setup Wizard...

The response file for this session can be found at:
 /u01/app/oracle/product/19.0.0/dbhome_1/install/response/db_2022-01-15_00-59-13AM.rsp

You can find the log of this install session at:
 /tmp/InstallActions2022-01-15_00-59-13AM/installActions2022-01-15_00-59-13AM.log

As a root user, execute the following script(s):
        1. /u01/app/oraInventory/orainstRoot.sh
        2. /u01/app/oracle/product/19.0.0/dbhome_1/root.sh

Execute /u01/app/oraInventory/orainstRoot.sh on the following nodes:
[db01]
Execute /u01/app/oracle/product/19.0.0/dbhome_1/root.sh on the following nodes:
[db01]


Successfully Setup Software.
Moved the install session logs to:
 /u01/app/oraInventory/logs/InstallActions2022-01-15_00-59-13AM
rootスクリプトの実行
[oracle@db01 dbhome_1]$ logout
[opc@db01 ~]$
[opc@db01 ~]$ sudo su -
Last login: Fri Jan 14 15:47:17 GMT 2022 on pts/0
[root@db01 ~]#
[root@db01 ~]# /u01/app/oraInventory/orainstRoot.sh
Changing permissions of /u01/app/oraInventory.
Adding read,write permissions for group.
Removing read,write,execute permissions for world.

Changing groupname of /u01/app/oraInventory to oinstall.
The execution of the script is complete.
[root@db01 ~]# /u01/app/oracle/product/19.0.0/dbhome_1/root.sh
Check /u01/app/oracle/product/19.0.0/dbhome_1/install/root_db01_2022-01-15_01-01-42-755954239.log for the output of root script
[root@db01 ~]#
[root@db01 ~]# cat /u01/app/oracle/product/19.0.0/dbhome_1/install/root_db01_2022-01-15_01-01-42-755954239.log
Performing root user operation.

The following environment variables are set as:
    ORACLE_OWNER= oracle
    ORACLE_HOME=  /u01/app/oracle/product/19.0.0/dbhome_1
   Copying dbhome to /usr/local/bin ...
   Copying oraenv to /usr/local/bin ...
   Copying coraenv to /usr/local/bin ...


Creating /etc/oratab file...
Entries will be added to the /etc/oratab file as needed by
Database Configuration Assistant when a database is created
Finished running generic part of root script.
Now product-specific root actions will be performed.
Oracle Trace File Analyzer (TFA) is available at : /u01/app/oracle/product/19.0.0/dbhome_1/bin/tfactl
リスナー起動
[oracle@db01 dbhome_1]$ lsnrctl start

LSNRCTL for Linux: Version 19.0.0.0.0 - Production on 15-JAN-2022 01:08:32

Copyright (c) 1991, 2019, Oracle.  All rights reserved.

Starting /u01/app/oracle/product/19.0.0/dbhome_1/bin/tnslsnr: please wait...

TNSLSNR for Linux: Version 19.0.0.0.0 - Production
Log messages written to /u01/app/oracle/diag/tnslsnr/db01/listener/alert/log.xml
Listening on: (DESCRIPTION=(ADDRESS=(PROTOCOL=tcp)(HOST=db01.subnet10220017.vcn10220017.oraclevcn.com)(PORT=1521)))

Connecting to (ADDRESS=(PROTOCOL=tcp)(HOST=)(PORT=1521))
STATUS of the LISTENER
------------------------
Alias                     LISTENER
Version                   TNSLSNR for Linux: Version 19.0.0.0.0 - Production
Start Date                15-JAN-2022 01:08:32
Uptime                    0 days 0 hr. 0 min. 0 sec
Trace Level               off
Security                  ON: Local OS Authentication
SNMP                      OFF
Listener Log File         /u01/app/oracle/diag/tnslsnr/db01/listener/alert/log.xml
Listening Endpoints Summary...
  (DESCRIPTION=(ADDRESS=(PROTOCOL=tcp)(HOST=db01.subnet10220017.vcn10220017.oraclevcn.com)(PORT=1521)))
The listener supports no services
The command completed successfully
DB作成
[oracle@db01 dbhome_1]$ dbca -silent -createDatabase                                                   \
>      -templateName General_Purpose.dbc                                         \
>      -gdbname ${ORACLE_SID} -sid  ${ORACLE_SID} -responseFile NO_VALUE         \
>      -characterSet AL32UTF8                                                    \
>      -sysPassword SysPassword1                                                 \
>      -systemPassword SysPassword1                                              \
>      -createAsContainerDatabase true                                           \
>      -numberOfPDBs 1                                                           \
>      -pdbName ${PDB_NAME}                                                      \
>      -pdbAdminPassword PdbPassword1                                            \
>      -databaseType MULTIPURPOSE                                                \
>      -memoryMgmtType auto_sga                                                  \
>      -totalMemory 2000                                                         \
>      -storageType FS                                                           \
>      -datafileDestination "${DATA_DIR}"                                        \
>      -redoLogFileSize 50                                                       \
>      -emConfiguration NONE                                                     \
>      -ignorePreReqs
Prepare for db operation
8% complete
Copying database files
31% complete
Creating and starting Oracle instance
32% complete
36% complete
40% complete
43% complete
46% complete
Completing Database Creation
51% complete
53% complete
54% complete
Creating Pluggable Databases
58% complete
77% complete
Executing Post Configuration Actions
100% complete
Database creation complete. For details check the logfiles at:
 /u01/app/oracle/cfgtoollogs/dbca/cdb1.
Database Information:
Global Database Name:cdb1
System Identifier(SID):cdb1
Look at the log file "/u01/app/oracle/cfgtoollogs/dbca/cdb1/cdb1.log" for further details.
接続確認
[oracle@db01 dbhome_1]$ ps -ef | grep pmon
oracle    6402     1  0 01:20 ?        00:00:00 ora_pmon_cdb1
oracle    9250 32701  0 01:30 pts/0    00:00:00 grep --color=auto pmon
[oracle@db01 dbhome_1]$ sqlplus / as sysdba

SQL*Plus: Release 19.0.0.0.0 - Production on Sat Jan 15 01:30:20 2022
Version 19.3.0.0.0

Copyright (c) 1982, 2019, Oracle.  All rights reserved.


Connected to:
Oracle Database 19c Enterprise Edition Release 19.0.0.0.0 - Production
Version 19.3.0.0.0

SQL> show pdbs

    CON_ID CON_NAME                       OPEN MODE  RESTRICTED
---------- ------------------------------ ---------- ----------
         2 PDB$SEED                       READ ONLY  NO
         3 PDB1                           READ WRITE NO
tnsnames.oraの設定
[oracle@db01 ~]$ cat $ORACLE_HOME/network/admin/tnsnames.ora

PDB1 =
  (DESCRIPTION =
    (ADDRESS = (PROTOCOL = TCP)(HOST = db01)(PORT = 1521))
    (CONNECT_DATA =
      (SERVER = DEDICATED)
      (SERVICE_NAME = PDB1)
    )
  )
自動起動設定
[oracle@db01 ~]$ vi /etc/oratab
[oracle@db01 ~]$ cat /etc/oratab
cdb1:/u01/app/oracle/product/19.0.0/dbhome_1:Y
PDB自動起動設定
SQL> alter pluggable database pdb1 open;

Pluggable database altered.

SQL> show pdbs

    CON_ID CON_NAME                       OPEN MODE  RESTRICTED
---------- ------------------------------ ---------- ----------
         2 PDB$SEED                       READ ONLY  NO
         3 PDB1                           READ WRITE NO
SQL>
SQL> alter pluggable database all save state;

Pluggable database altered.
ADW+APEXで体重管理アプリ作成のマネをしてみる③ ~ APEXユーザーの作成~
目次
ここまで
アプリケーションが作成できたので、ユーザー用のAPEXユーザーを作成します。
アプリの利用者は家族を想定していて、ログイン後は全員分のデータを参照・更新可能とします。
なので、共用のユーザーを1つ作成します。
ここまでの、アプリの作成まではこちらで実施しています。
ユーザーの作成
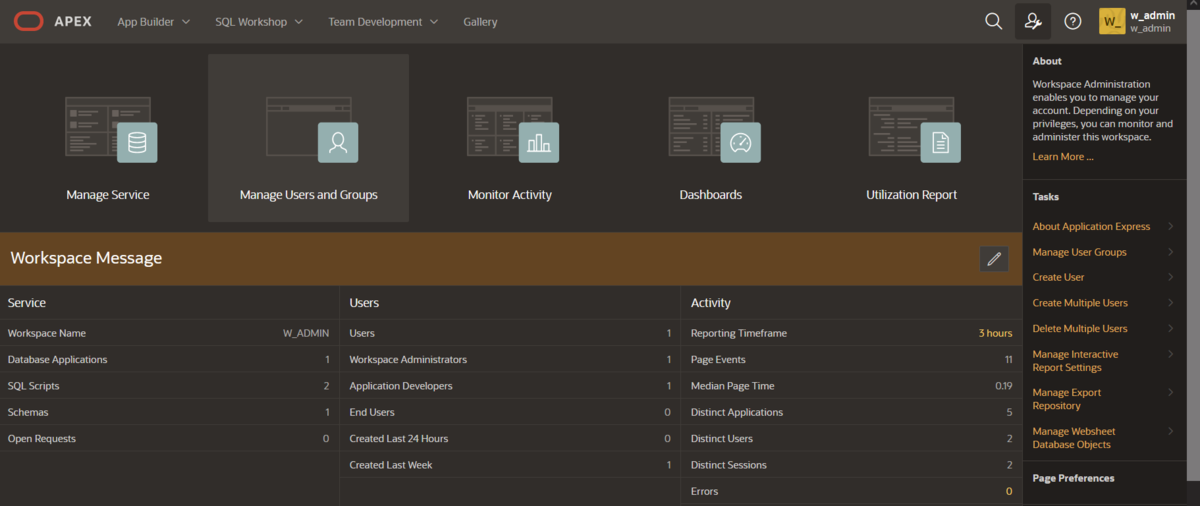
Administration画面へ遷移します

Manage Users and Groupを選択
Create User

必要項目を入力して、Create Userします
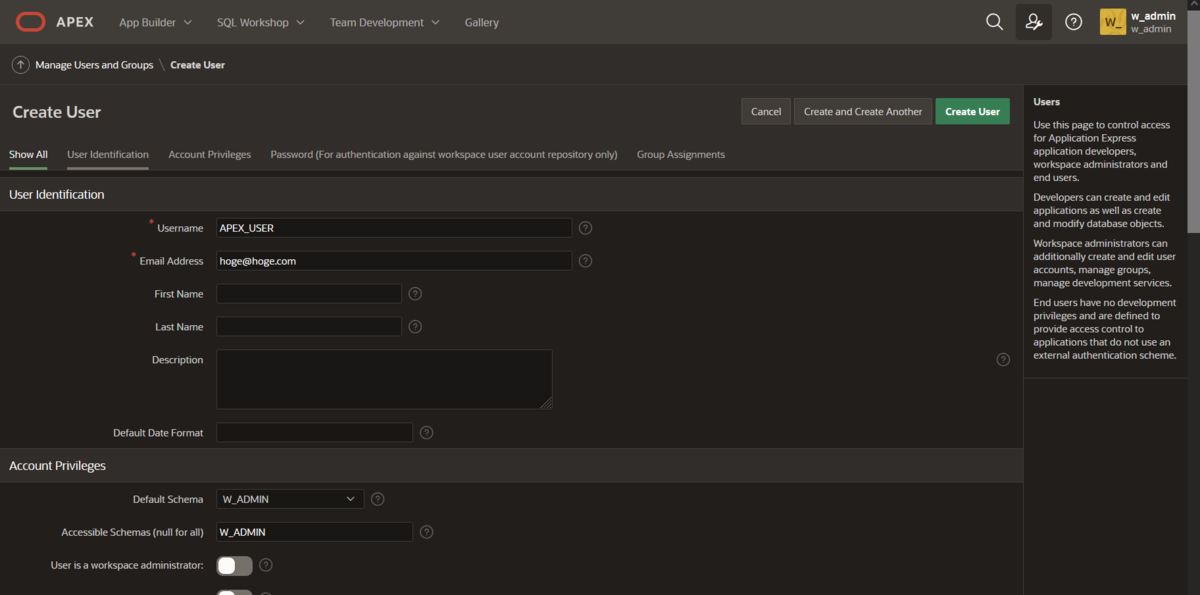
作成されます。

ログイン確認
ログインしてみます。

初回ログイン時にパスワードを変更し、変更後のパスワードでログインできればOKです。
